Create a 'Scan to SharePoint' App
A 'Scan to SharePoint' App allows your end users to select a SharePoint destination for scanned documents directly from the MFP at scan time. To create a 'Scan to SharePoint' App with a preconfigured folder destination, or to utilize Form Recognition to collect meta data and/or to construct the SharePoint destination URL, see Create 'Scan to SharePoint folder' App.
Udocx applications may be user-specific (only appearing when a specific user is logged in), MFP specific, or organization-wide (appearing on all MFP devices configured within the organization). Udocx applications at the organization level also have an ‘Email Enable’ option that creates an industry-standard SMTP interface with a unique email address hosted by Udocx. See Email Enable for a detailed description and Email Enable a Udocx Application for setup information.
Steps
1.Go to the Udocx administrator portal and login with your admin account. Or, if your admin enabled you, login with your user account to customize your own Apps.
2.To create an organisation-wide App select Settings > Applications.
To create a MFP specific App select MFPs > "configured MFP" > Applications.
To create a user specific App select Users > "user" > Applications.
If you are a user and want to customize your own Apps go to [My user settings].
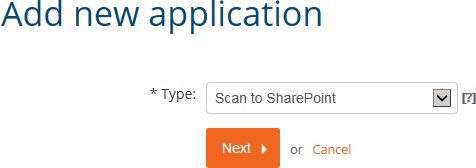
3.Choose [Add new application].
4. Select “Scan to SharePoint” and press [Next].
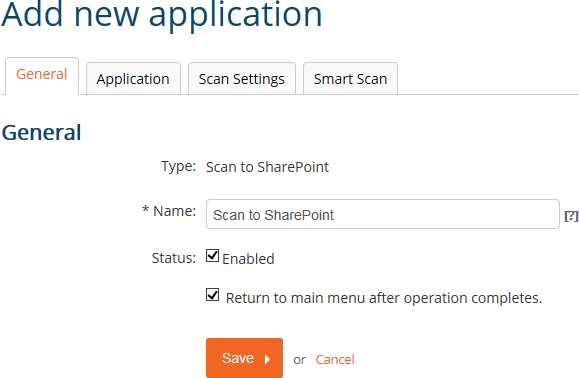
5.In the “General” tab, give the newly created App a name and make sure the “Status” is enabled. You can also choose whether to stay in the app or return to the Udocx main menu after each operation.
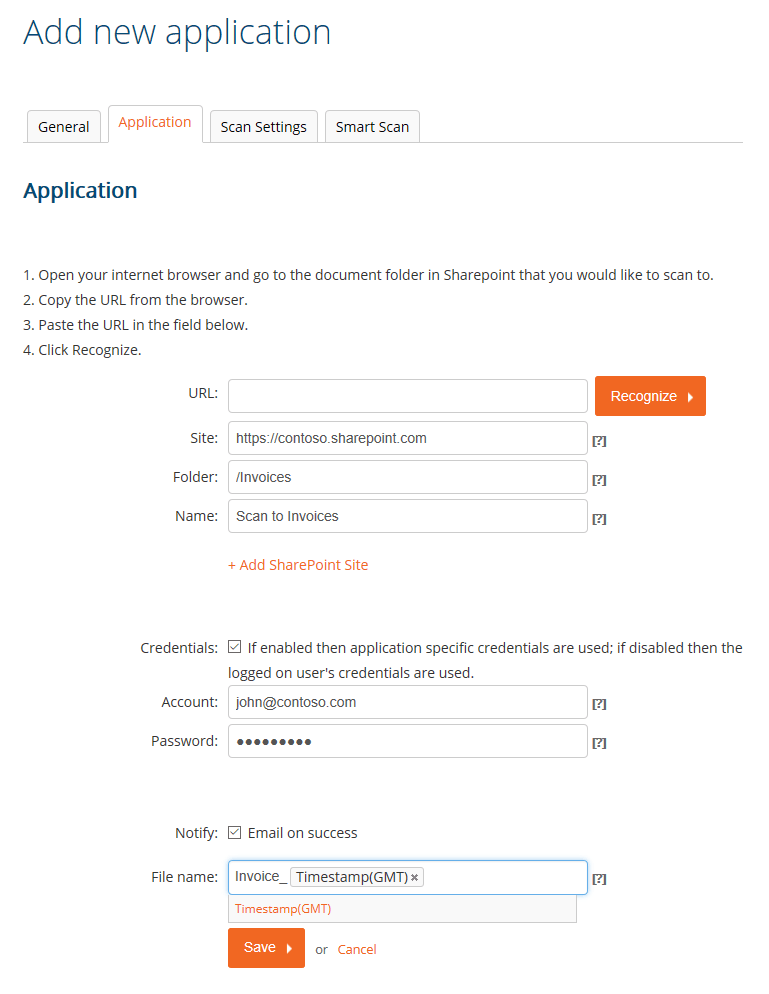
6.Select the “Application” tab and specify the SharePoint URL using the 'Site' and 'Folder' fields. These two fields combined create the “root” site from which users will browse for their SharePoint destination at scan-time. If you're unsure of how to construct the root path, see Determining your SharePoint URL for a detailed explanation.
You may add additional root SharePoint URLs by clicking the [+Add SharePoint Site] link. Each configured site will be displayed to the end-user as the root of the search path.
If you wish to override the credentials of the current user for SharePoint access, you may enter alternative credentials here. The administrator should ensure that overriding credentials here will not compromise SharePoint security.
You may choose if an email notification should be generated for each scanning operation.
You may configure the file name based on any combination of explicit (hard-coded) text, a GMT date/time stamp, and form recognition variables (when form recognition is being used). Note that it is best practice to include the GMT date/time stamp in your file names to avoid potential file name collisions.
7.The 'Scan Settings' tab allows you to configure the scan settings that will be used by default and whether or not the end-user can modify those settings at scan time.
The "Job build" option controls how the MFP functions when a document is placed on the glass instead of in the document feeder. When enabled, a single Udocx job may be constructed from multiple scan operations. When disabled, only a single page will be scanned and immediately processed by Udocx without further confirmation. This behavior is MFP specific and may not apply to your make/model of device.
Note: Scan options that are not applicable for your particular make/model of the MFP will be safely ignored.

8.All Udocx scanning applications can utilize Udocx 'Smart Scan' technology. Smart Scan allows multi-page scanning operations to be split into two or more jobs based on a variety of criteria. The splitting method that you select when configuring Smart Scan will depend on the attributes of the documents being processed. See Smart Scan for examples of how this technology can be used to automate both document archiving and daily business workflows.
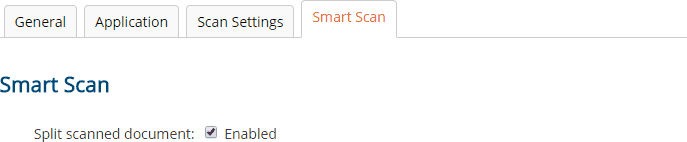
First, on the 'Smart Scan' tab of the Udocx application, enable the "Split scanned document" option.
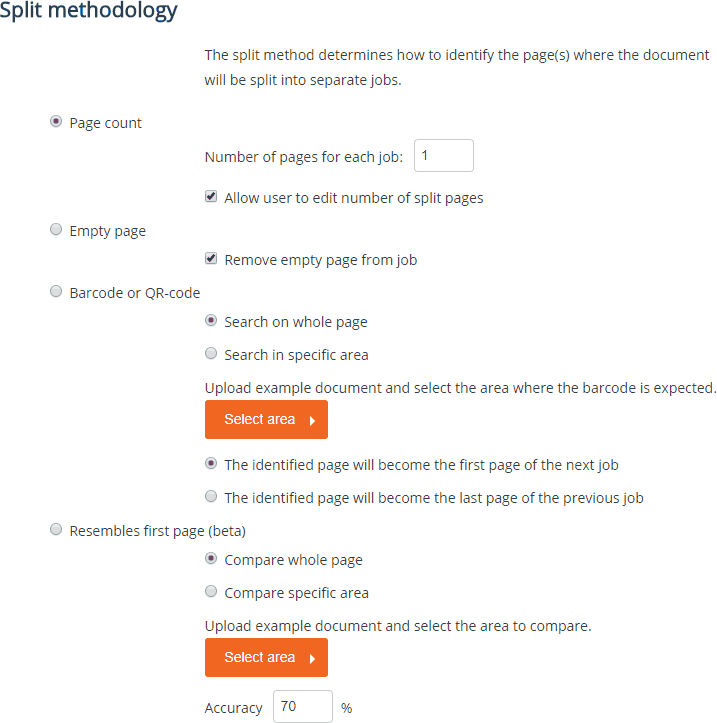
Next, choose the split methodology that you would like to use from the four available options:
Page Count - When the page count of the documents is always the same, you can split multi-page scans based strictly on the number of pages. It is important to note that when duplex (two-sided) scanning is available and enabled within the Udocx application, each physical page will result in two scanned pages (front and back), and will count as two scanned pages for the purposes of Page Count splitting.
When "Allow user to edit number of split pages" is enabled, a dialog will be visible on the Udocx display to allow the user to adjust the document page count for each scanning operation at scan time. This option is not valid when using email enabled Udocx applications via SMTP.
Empty Page - This option will split a multi-page scan into separate documents whenever a blank page is detected. When splitting based on this methodology, you also have the option to remove the empty page from the job.
Barcode or QR-code - This option will split a multi-page scan into separate documents whenever a barcode or QR code is detected. You can choose to trigger on a barcode/QR-code found anywhere on a page, or in a specific area of a page based on an uploaded example page and template ("Select Area"). Finally, you can also specify whether a detected barcode/QR-code page will become the first page of the next job or the last page of the previous (current) job.
Resembles First Page - This option will split a multi-page scan into separate documents whenever a page similar to the first scanned page is detected. You can choose to compare the whole page or only a specific area of the page based on an uploaded example page and template ("Select Area"). Finally, an accuracy percentage setting allows you to fine-tune the resemblance detection (lower this value if resemblance-based split points are being missed).
9.Click [Save] to complete the App configuration.