Create a 'Scan to SharePoint Folder' App
A 'Scan to SharePoint Folder' App allows your users to scan directly to a predetermined SharePoint document library (folder). It has no options for browsing to other SharePoint destinations. This App is very efficient for repetitive workflow operations because it avoids the extra step of selecting a SharePoint folder for each scan. If you want to choose the SharePoint destination folder at scan-time, see Create 'Scan to SharePoint' App.
Udocx applications may be user-specific (only appearing when a specific user is logged in), MFP specific, or organization-wide (appearing on all MFP devices configured within the organization). Udocx applications at the organization level also have an ‘Email Enable’ option that creates an industry-standard SMTP interface with a unique email address hosted by Udocx. See Email Enable for a detailed description and Email Enable a Udocx Application for setup information.
Steps
1.Go to the Udocx administrator portal and login with your admin account. Or, if your admin enabled you, login with your user account to customize your own Apps.
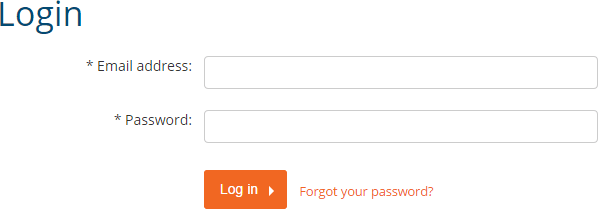
2.To create an organization-wide App select Settings > Applications.
To create a MFP specific App select MFPs > "configured MFP" > Applications.
To create a user specific App select Users > "user" > Applications.
If you are a user and want to customize your own Apps go to [My user settings].
3.Choose [Add new application].
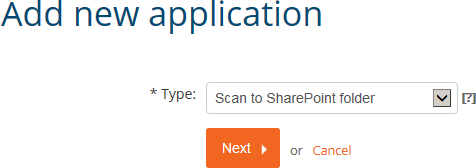
4.Select “Scan to SharePoint Folder” and press [Next].
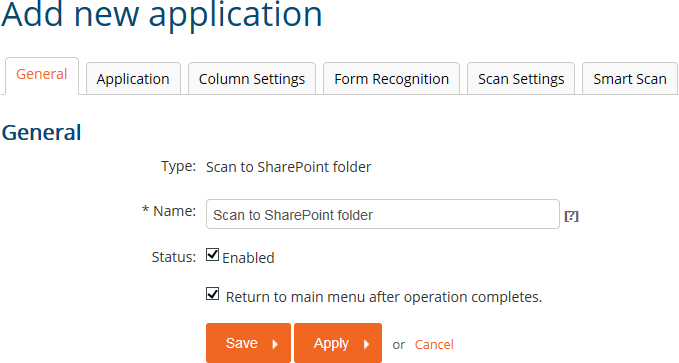
5.In the “General” tab, give this new app a name and make sure the “Status” is enabled. You can also set whether to stay within the app or return to the Udocx main menu between each scan operation.
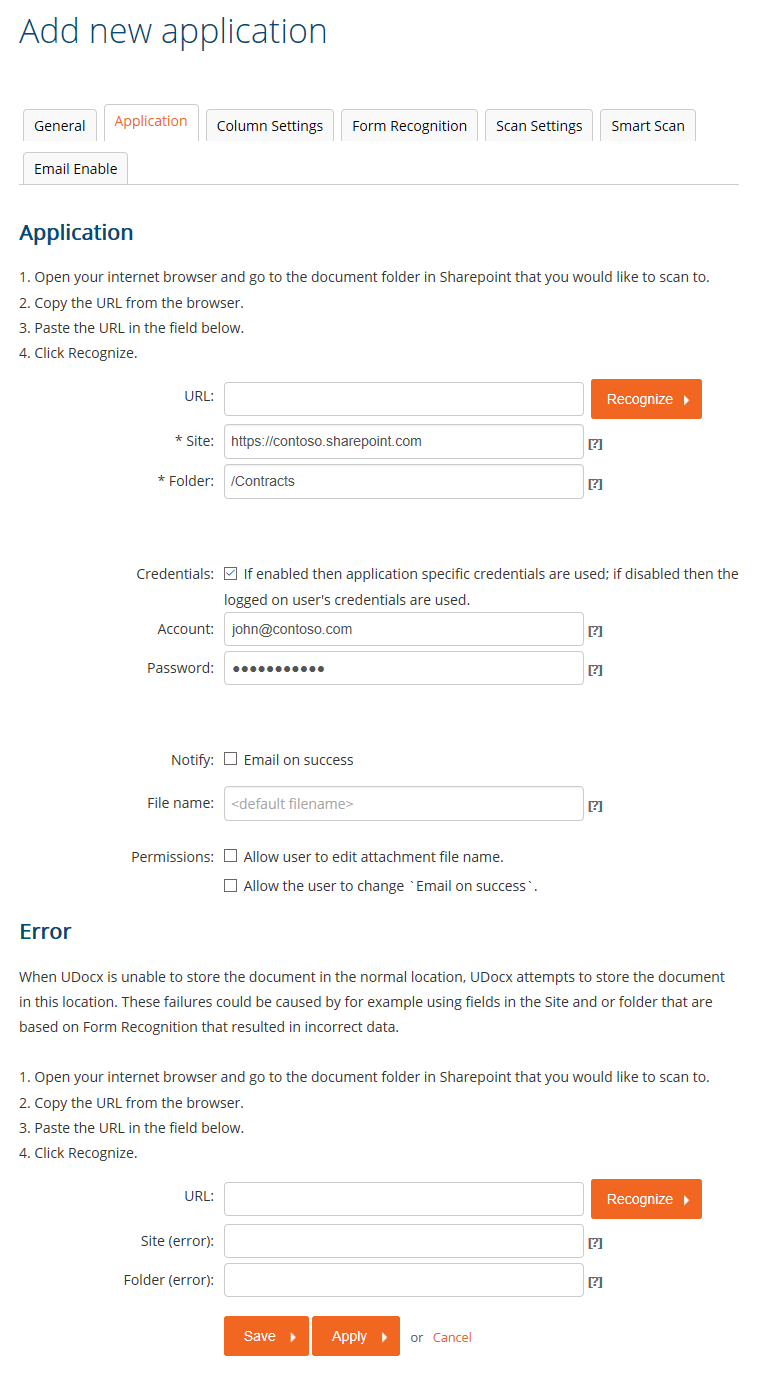
6.Select the “Application” tab and specify the URL of the SharePoint site.
The "Site" field is the URL of the SharePoint site. You can retrieve this link from your browser (see the knowledge base article Determining Your SharePoint URL for more information). When using the Udocx form recognition feature, the 'Fields' button will allow you to incorporate field data into your site URL.
The "Folder" field is the subpath that will be appended to the site URL. You can retrieve the folder name from your browser (see the article Determining Your SharePoint URL for more information). When using the Udocx form recognition feature, the 'Fields' button will allow you to incorporate field data into your site URL.
Note: Udocx cannot create SharePoint folders. When utilizing field data to build the routing URL, it is important to configure an error route to handle unexpected form data (see below).
If you wish to override the credentials of the current user for SharePoint access, you may enter alternative credentials here. The administrator should ensure that overriding credentials here will not compromise SharePoint security.
The "Notify" option will send an email to the current user to verify the operation.
You may configure a folder to use for routing when defined route fails. This is particularly useful when your site or URL includes field data from the Udocx form recognition feature as unexpected data can result in an invalid routing URL.
You may configure the file name based on explicit text + a GMT date/time stamp or accept the default generated file name (Scan_GMT date/time).
You may adjust the permissions of the user within this app. The user will not be able to modify the attachment file name or disable the notification unless these options are checked.
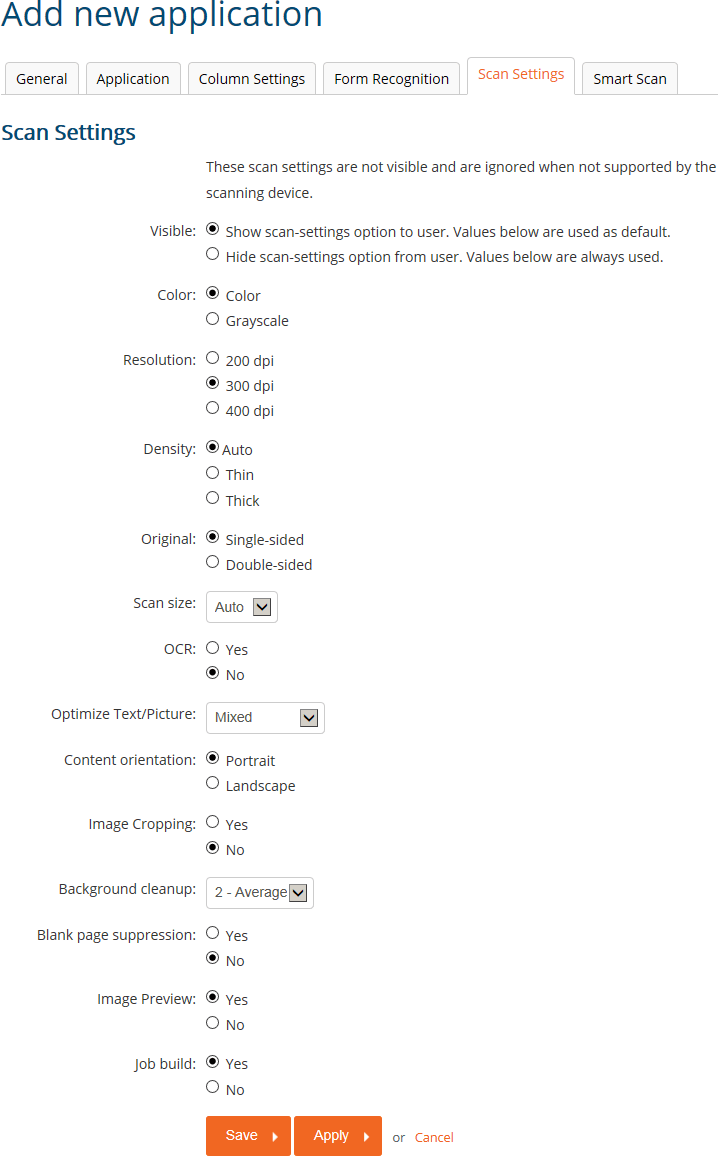
7.The 'Scan Settings' tab allows you to configure the scan settings that will be used by default and whether or not the end-user can modify those settings at scan time.
The "Job build" option controls how the MFP functions when a document is placed on the glass instead of in the document feeder. When enabled, a single Udocx job may be constructed from multiple scan operations. When disabled, only a single page will be scanned and immediately processed by Udocx without further confirmation. This behavior is MFP specific and may not apply to your make/model of device.
Note: Scan options that are not applicable for your particular make/model of the MFP will be safely ignored.
8.All Udocx scanning applications can utilize Udocx 'Smart Scan' technology. Smart Scan allows multi-page scanning operations to be split into two or more jobs based on a variety of criteria. The splitting method that you select when configuring Smart Scan will depend on the attributes of the documents being processed. See Smart Scan for examples of how this technology can be used to automate both document archiving and daily business workflows.

First, on the 'Smart Scan' tab of the Udocx application, enable the "Split scanned document" option.
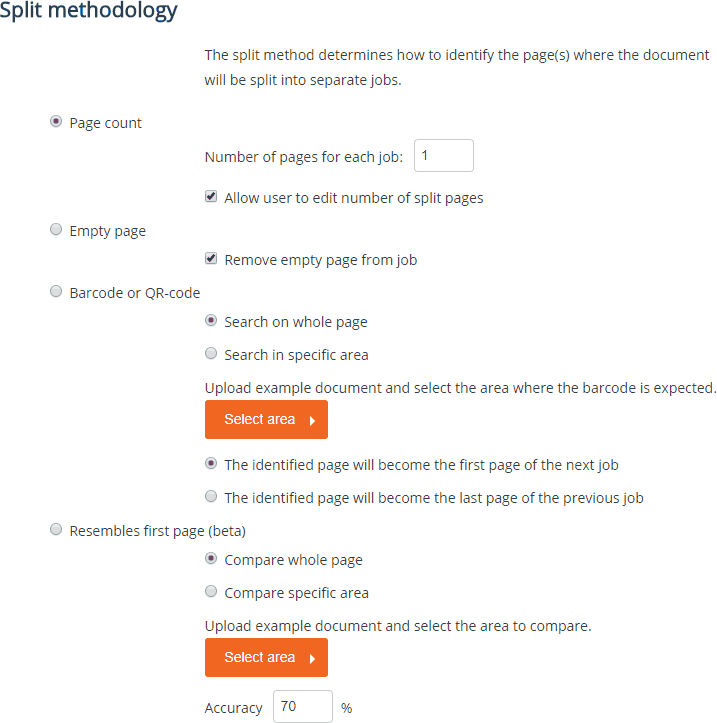
Next, choose the split methodology that you would like to use from the four available options:
Page Count - When the page count of the documents is always the same, you can split multi-page scans based strictly on the number of pages. It is important to note that when duplex (two-sided) scanning is available and enabled within the Udocx application, each physical page will result in two scanned pages (front and back), and will count as two scanned pages for the purposes of Page Count splitting.
When "Allow user to edit number of split pages" is enabled, a dialog will be visible on the Udocx display to allow the user to adjust the document page count for each scanning operation at scan time. This option is not valid when using email enabled Udocx applications via SMTP.
Empty Page - This option will split a multi-page scan into separate documents whenever a blank page is detected. When splitting based on this methodology, you also have the option to remove the empty page from the job.
Barcode or QR-code - This option will split a multi-page scan into separate documents whenever a barcode or QR code is detected. You can choose to trigger on a barcode/QR-code found anywhere on a page, or in a specific area of a page based on an uploaded example page and template ("Select Area"). Finally, you can also specify whether a detected barcode/QR-code page will become the first page of the next job or the last page of the previous (current) job.
Resembles First Page - This option will split a multi-page scan into separate documents whenever a page similar to the first scanned page is detected. You can choose to compare the whole page or only a specific area of the page based on an uploaded example page and template ("Select Area"). Finally, an accuracy percentage setting allows you to fine-tune the resemblance detection (lower this value if resemblance-based split points are being missed).
9. Click [Save] to confirm the App, which will take you back to the App overview.
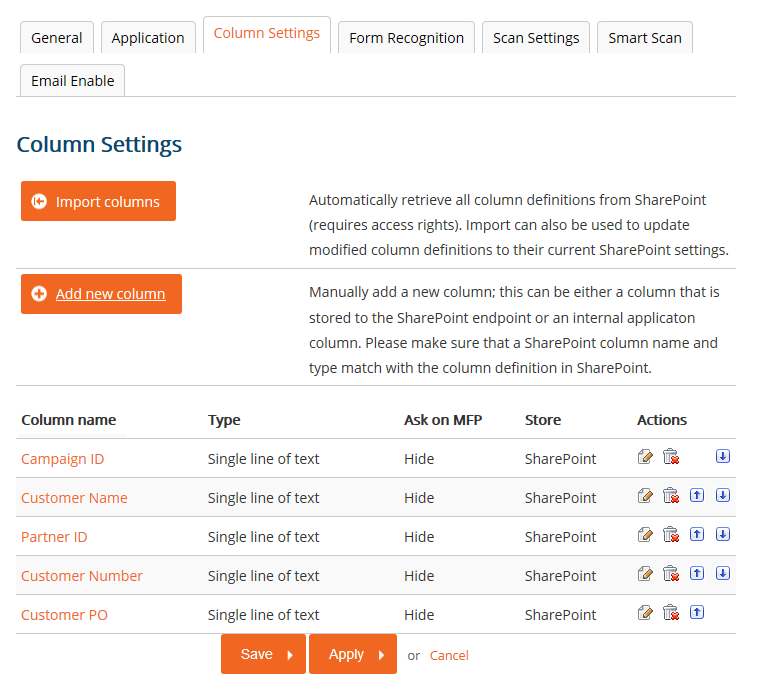
Note: The "Column Settings" tab allows you to import or manually define metadata columns within your SharePoint document library. This tab is not available until the App has been saved. It is recommended to complete the basic configuration, save the App, then edit the App to add/import columns as needed.
If you have custom SharePoint columns that you wish to modify from within the App, you may import them from the 'Column Settings' tab at this time.
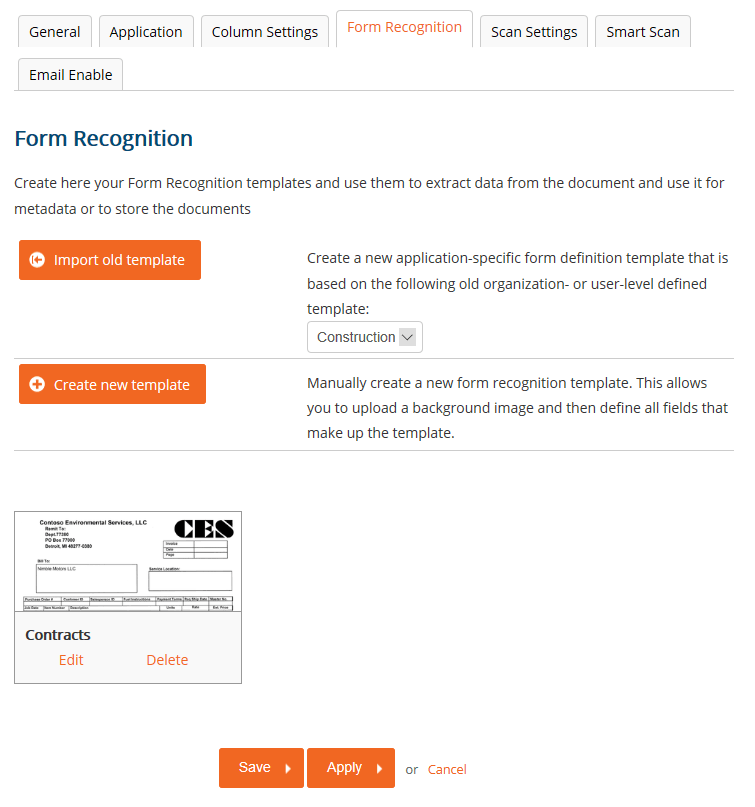
10.Click on the 'Form Recognition' tab if you wish you use form recognition to set the SharePoint URL or populate meta data columns within the SharePoint document library.
The configuration of Udocx form recognition always begins with the creation or importation of a form recognition template. This is when you upload an example form and define the relevant data areas. Once form recognition has been configured, you can use the captured data to populate SharePoint meta data columns, use the data to build the destination SharePoint URL, and/or construct the filename of the document.
11.Click [Save] to complete the App configuration.

